¶ Roles and Permissions: Role-Based Access Control (RBAC)
In modern web development, Roles represent categories of users (such as Admin, Manager, or Customer), while Permissions define the specific actions those users are allowed to perform (such as viewing a report, editing a record, or deleting data). Implementing a robust access control layer is essential to ensure that sensitive information is only accessible to authorized individuals, thereby maintaining the security and integrity of your application.
RadSystems Studio makes it incredibly simple to implement complex Role-Based Access Control (RBAC) systems. You can define your entire security hierarchy through an intuitive visual interface without writing a single line of code.
¶ The Access Control Interface
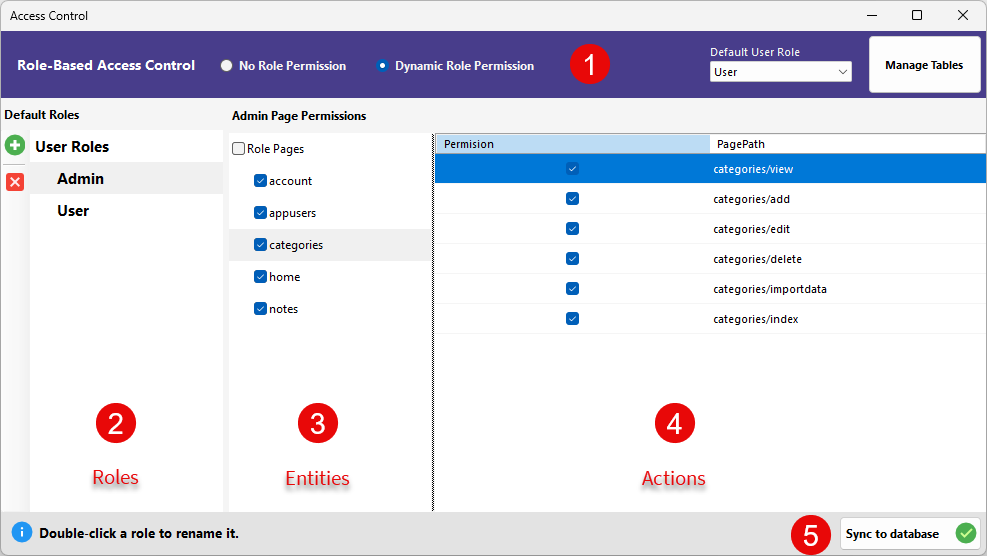
The Access Control window is designed with a clear, logical layout featuring a top configuration header and a three-column management structure. This design allows you to quickly see which roles have access to which parts of your application.
¶ 1. Configuration Header
The top section of the window controls the global behavior of your security system.
-
Role-Based Access Control Mode: Choose between No Role Permission (all logged-in users have equal access) or Dynamic Role Permission (enables the granular control system described below).
-
Default User Role: Select the role that is automatically assigned to new users when they register (e.g., User).
-
Manage Tables: Opens a dialog to select which database tables should be included in the permission management system.
¶ 2. Default Roles (Column 1)
This column allows you to manage the different user categories in your system.
-
Add Role (+): Click the green plus icon to create a new user role.
-
Role List: Displays all currently defined roles, such as Admin and User.
-
Delete Role (x): Select a role and click the red "x" to remove it from the system.
-
Rename Role: You can double-click any role in this list to edit its name directly.
¶ 3. Page Permissions: Entities (Column 2)
This central column lists all the "Entities" or modules within your application, such as your database tables and core pages.
-
Role Pages Checkbox: Checking this allows you to quickly select or deselect all entities for the currently highlighted role.
-
Entity List: Lists individual modules like account, appusers, categories, home, and notes. Checking an entity here grants the selected role access to that module. Selecting an entity also populates the third column with specific action-level permissions.
¶ 4. Page Permissions: Actions (Column 3)
This column provides granular control over what a user can actually do within a selected entity.
- Permission Checkboxes: Once an entity (like "categories") is selected in the second column, you can check or uncheck specific paths here.
¶ 5. Finalizing Changes
- Sync to database: Once you have configured your roles and permissions, click this button to write the security configuration to your database. Depending upon the Backend framework you've selected, all the necessary tables are automatically generated with the permissions settings and roles settings automatically inserted into the respected tables.
¶ Manage Tables
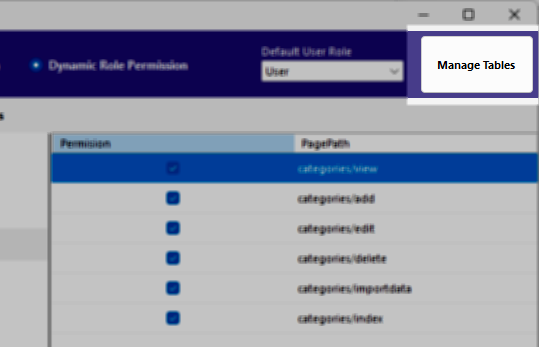
In RadSystems Studio, the Manage Tables feature is a critical configuration step for establishing the physical storage of your security logic. This interface allows you to define exactly which tables and fields in your database will house your application's access control data.
To maintain a dynamic security system, the application requires specific structures in your database to hold the access control records. Clicking the Manage Tables button opens a dedicated window where you link your project to these tables.
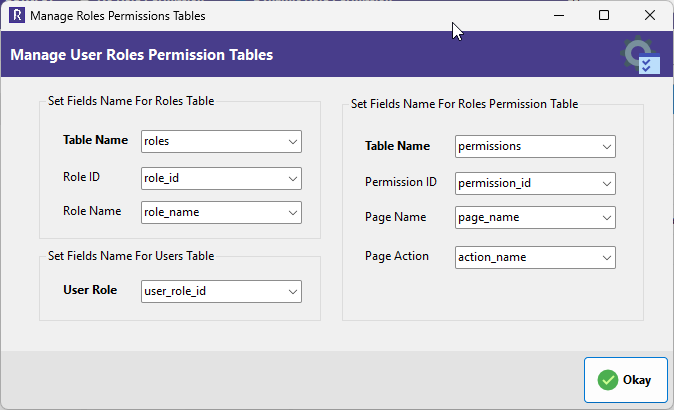
¶ 1. Set Fields Name For Roles Table
This section defines the table that stores the high-level categories of users in your system.
-
Table Name: Select the database table intended to store the list of roles, such as roles.
-
Role ID: Choose the unique identifier field for the roles, typically role_id.
-
Role Name: Select the field that stores the human-readable name of the role, such as role_name.
¶ 2. Set Fields Name For Roles Permission Table
This section configures the table that maps specific roles to their allowed actions across your application pages.
-
Table Name: Specify the table that will store the detailed permission mappings, such as permissions.
-
Permission ID: Select the unique primary key for the permission records, typically permission_id.
-
Page Name: Choose the field used to store the name of the application page or module (e.g., "categories").
-
Page Action: Map the field that stores the specific action allowed on that page (e.g., "edit" or "delete").
¶ 3. Set Fields Name For Users Table
This setting connects individual user accounts to the role-based system.
- User Role: Map the specific field in your main users table (often user_role_id) that links each user account to an entry in your Roles table. This is how the application identifies a user's permissions immediately upon login.
¶ Deployment and Synchronization
Once you have finished mapping these fields and configuring your permissions in the main visual interface, click Okay to save the configuration. All the necessary tables are automatically generated with the permissions settings and roles settings automatically inserted into the respected tables.