¶ Database Query Builder
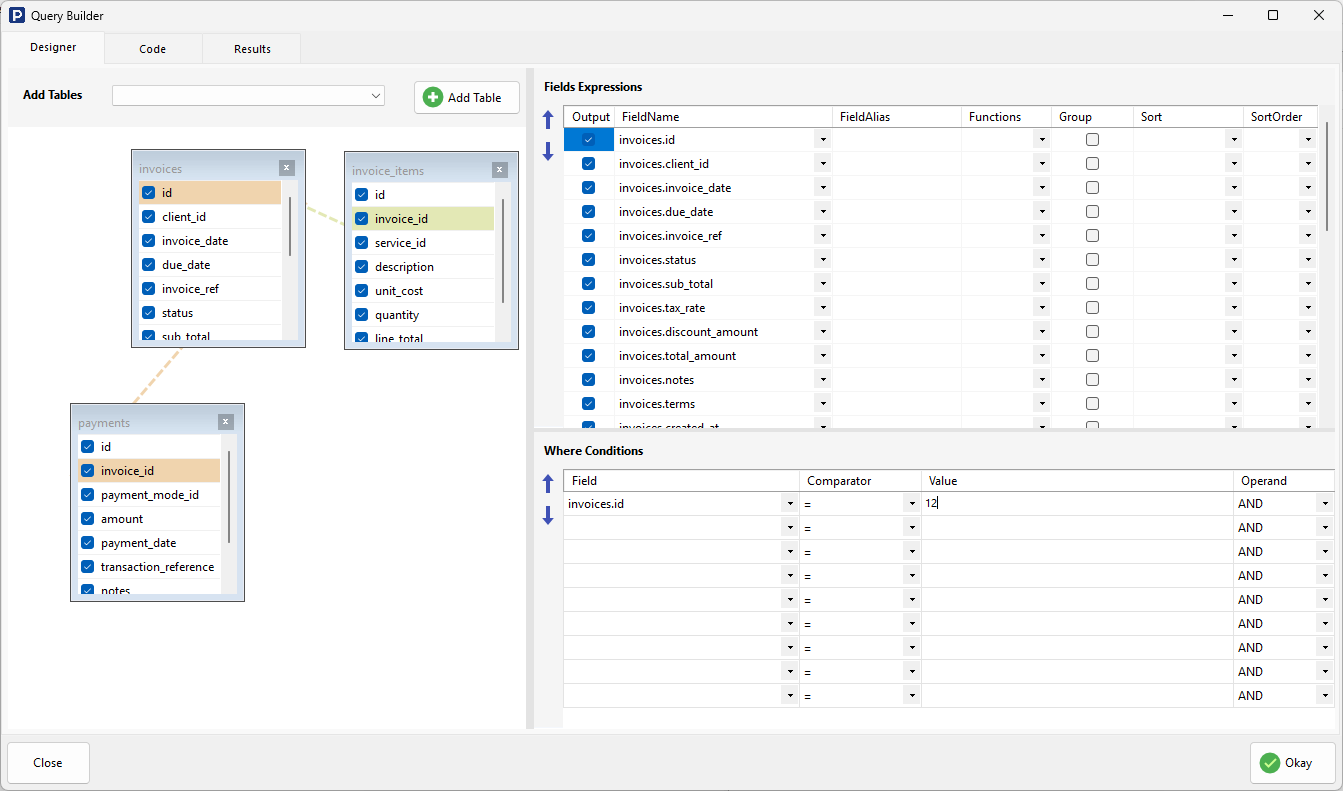
The Database Query Builder in RadSystems Studio is a powerful visual interface designed to help you construct complex SQL queries without needing to write code manually. It provides a drag-and-drop environment to select data, define relationships, and apply filters.
The Query Builder is organized into several functional areas: the Designer Canvas, the Fields Expressions panel, and the Where Conditions panel.
¶ Navigation Tabs
-
Designer: The visual mode described above.
-
Code: Switch to this tab to see the raw SQL query generated by the Studio.
-
Results: Click this to run the query and preview the data returned by the database.
¶ 1. Designer Canvas
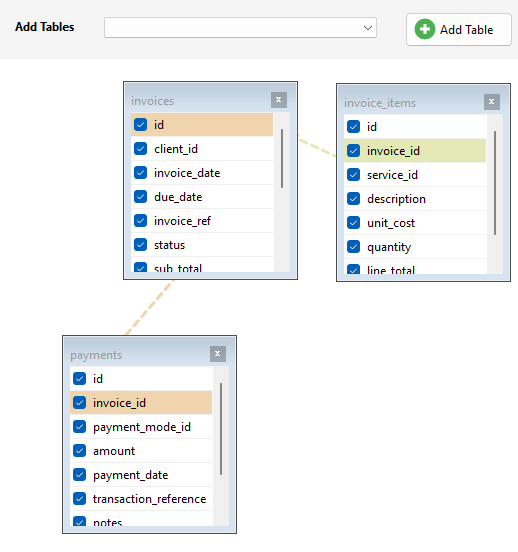
The large area on the left is your visual workspace where you manage tables and their relationships.
-
Add Tables Dropdown: Use the dropdown menu at the top to select a table from your database.
-
Add Table Button: Click this to place the selected table onto the canvas as a "Table Box."
-
Table Boxes: Each box (e.g., invoices, payments) displays all available fields for that table. You can check individual boxes next to field names to include them in your query.
-
Defining Joins (Drag and Drop): You can easily set up relationships between tables by dragging a field from one table and dropping it onto a field in another.
- Example: To link line items to their main record, drag invoice_id from the invoice_items table and drop it onto the id field of the invoices table. A connector line will appear, representing the SQL JOIN.
¶ 2. Fields Expressions Panel
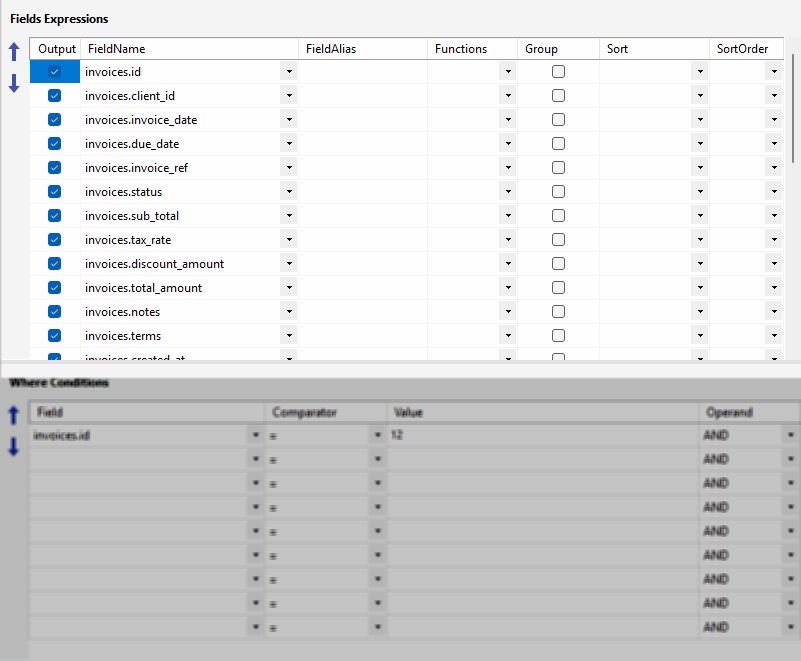
The top-right panel allows you to fine-tune how the selected data is displayed and calculated.
-
Output: This checkbox determines if the field will be visible in the final query results.
-
FieldName: Displays the source table and field name (e.g.,
invoices.sub_total). -
FieldAlias: Enter a custom name here if you want to rename a column for your application's list view (e.g., renaming
sub_totaltoAmount_Before_Tax). -
Functions: Use this dropdown to apply SQL aggregate functions like
SUM,COUNT,AVG,MIN, orMAXto a field. -
Group: Check this box if you are using aggregate functions and need to group the results by a specific field (SQL
GROUP BY). -
Sort / SortOrder: Define the default sorting for the view. Choose Ascending or Descending and set the priority using the SortOrder column.
-
Reorder Arrows: Use the blue up/down arrows on the left to change the order in which columns appear in your data list.
¶ 3. Where Conditions Panel
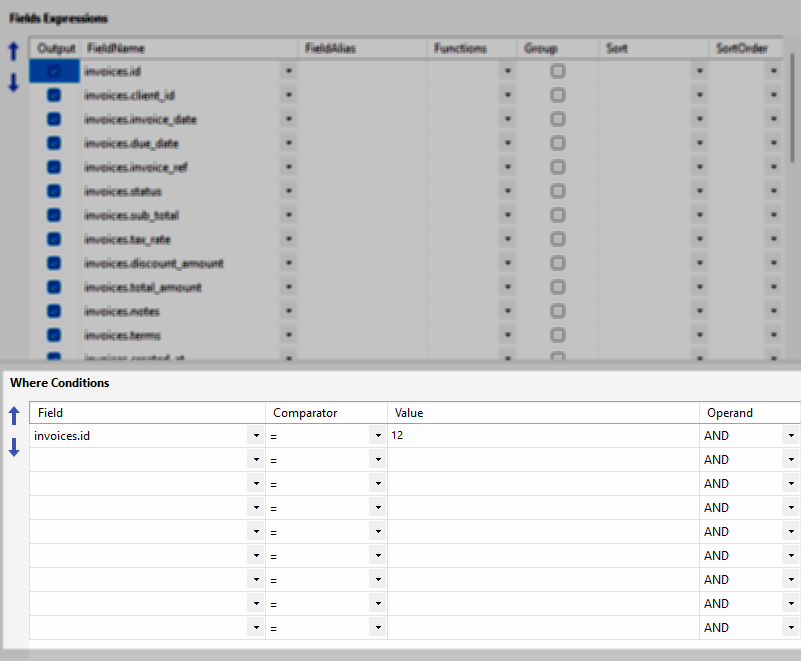
The bottom-right section is used to filter your data (SQL WHERE clause).
-
Field: Select the field you wish to filter by (e.g.,
invoices.id). -
Comparator: Choose a logical operator, such as = (Equals), > (Greater Than), < (Less Than), LIKE (for partial text matching), or IS NULL.
-
Value: Enter the specific criteria for the filter (e.g., setting the value to
12to only see records related to invoice #12). -
Operand: When using multiple filters, define how they relate using AND (both conditions must be true) or OR (either condition can be true).
¶ 4. Action Buttons
-
Close: Exits the builder. Unsaved changes are discarded.
-
Okay: Saves your custom query and creates the view within your project.