¶ Creating a New Project
RadSystems Studio allows you to build powerful web applications by combining a robust backend with a modern frontend framework. Understanding these two components is key to setting up your project correctly.
¶ Backend vs. Frontend Frameworks
-
Backend Framework: This is the "brain" of your application. It handles data processing, security, and database communication. In most configurations, the backend acts as an API (Application Programming Interface) that serves data to your frontend.
-
Frontend Framework: This is the "face" of your application. It defines the user interface, layout, and how users interact with your data.
-
Special Case (PHP-Classic): If you select PHP Laravel as your backend and Bootstrap jQuery as your frontend, you are creating a PHP-Classic project. In this specific mode, no separate API is involved; the application is generated as a traditional server-side rendered web app.
¶ Step 1: Framework Selection
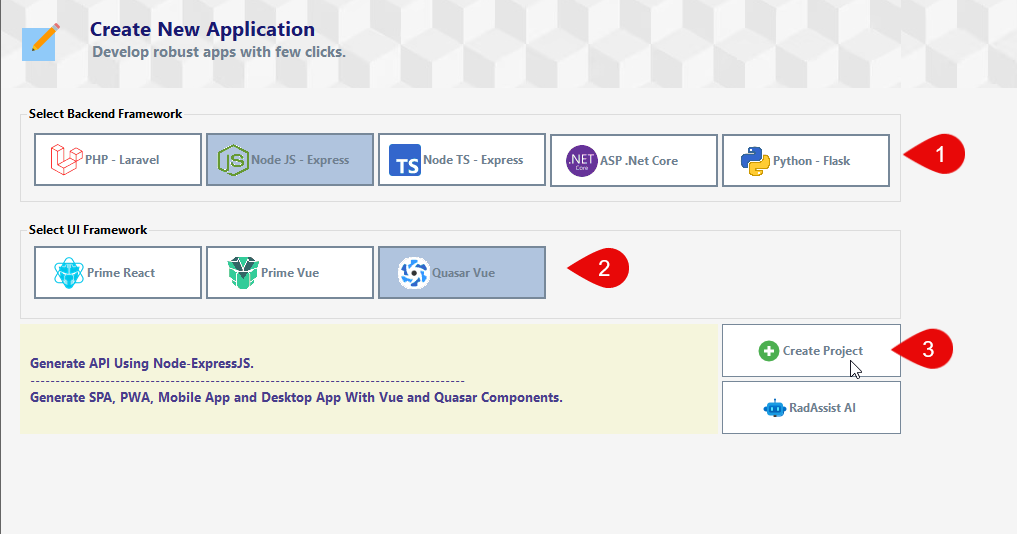
Before configuring project details, you must select your technology stack on the startup screen.
-
Select Backend Framework (3): Choose the server-side technology. Options include PHP - Laravel, Node JS - Express, Node TS - Express, ASP .Net Core, or Python - Flask.
-
Select UI Framework (4): Choose the client-side technology. Options include Prime React, Prime Vue, Quasar Vue, or Bootstrap JQuery.
-
Create Project (5): Once your frameworks are selected, click this button to move to the configuration screen.
¶ Step 2: Project Configuration
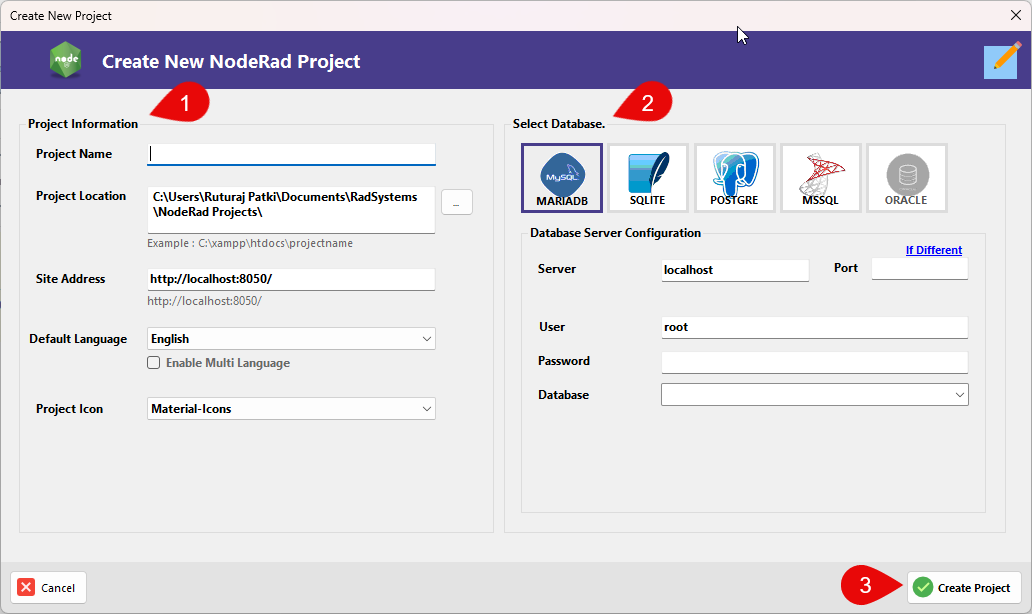
After clicking "Create Project," the configuration screen appears. This is where you define where your project lives and how it connects to your data.
¶ 1. Project Information
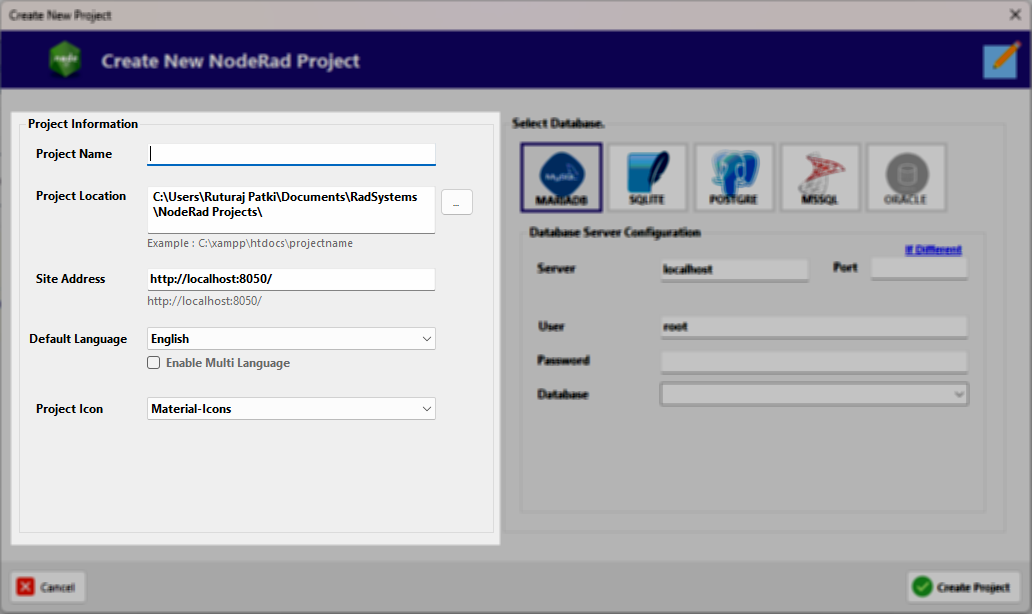
-
Project Name: Enter a unique name for your application. This name identifies your project within RadSystems Studio.
-
Project Location: This shows the directory where your source code will be generated. You can click the ellipsis button (...) to choose a custom folder. We recommend you select empty folder as project location.
-
Site Address: The local URL where your app will be hosted during development (e.g.,
http://localhost:8050/). -
Default Language: Select the primary language for your application's interface.
-
Enable Multi Language: Check this box if you want to add support for multiple languages and translation files.
-
Project Icon: Select the icon library that will be used for your application’s menus and buttons.
¶ 2. Select Database & Server Configuration
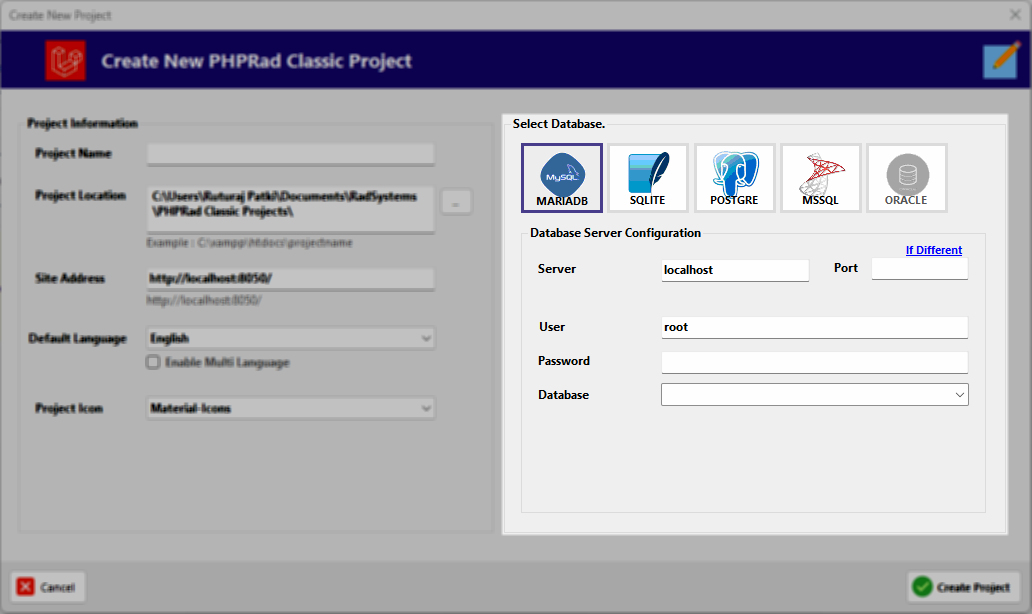
RadSystems Studio reads your database schema to automatically generate pages.
-
Select Database: Click the icon for your database engine (MARIADB/MySQL, POSTGRE, MSSQL).
-
Server: Enter the address of your database server (usually
localhostfor local development). -
Port: If your database uses a non-standard port, click If Different to reveal the port input field.
-
User: The username required to access your database server (e.g.,
root). -
Password: The password associated with your database user.
-
Database: Once the connection details are entered, use this dropdown to select the specific database you wish to use for this project.
¶ 3. Finalizing
-
Create Project (3): Click this button to finalize your settings. RadSystems Studio will now scan your database tables and set up your development workspace.
-
Cancel: Click this to discard your changes and return to the startup screen.